When Hardware Met NodeJS

make web app faster
WEB SERVER
var http = require('http');
http.createServer(function (req, res) {
    res.writeHead(200, {'Content-Type': 'text/plain'});
    res.end('Hello World\n');
}).listen(1337, '127.0.0.1');
console.log('Server running at http://127.0.0.1:1337/');
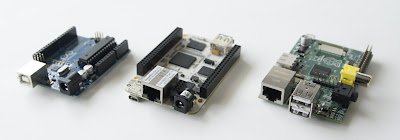
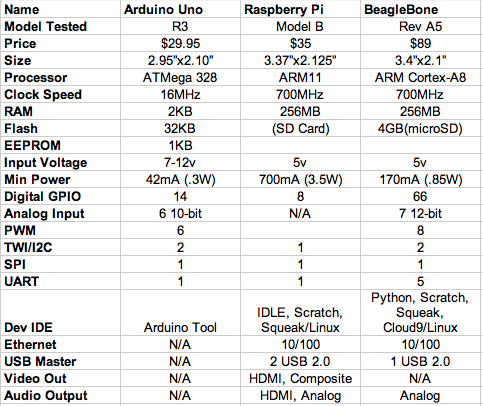
Low-cost ARM IS COMING
with high performance

(Model B now ships with 512MB of RAM)
What if these hardware can be controlled by nodeJS?
If so, it could be easy to control hardware from website!

So, how are they hook up with nodeJS?
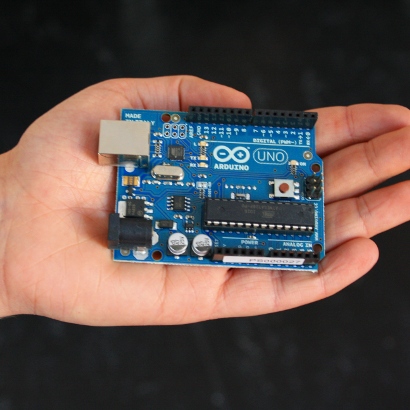
Arduino + NodeJS
↓

↓
↓
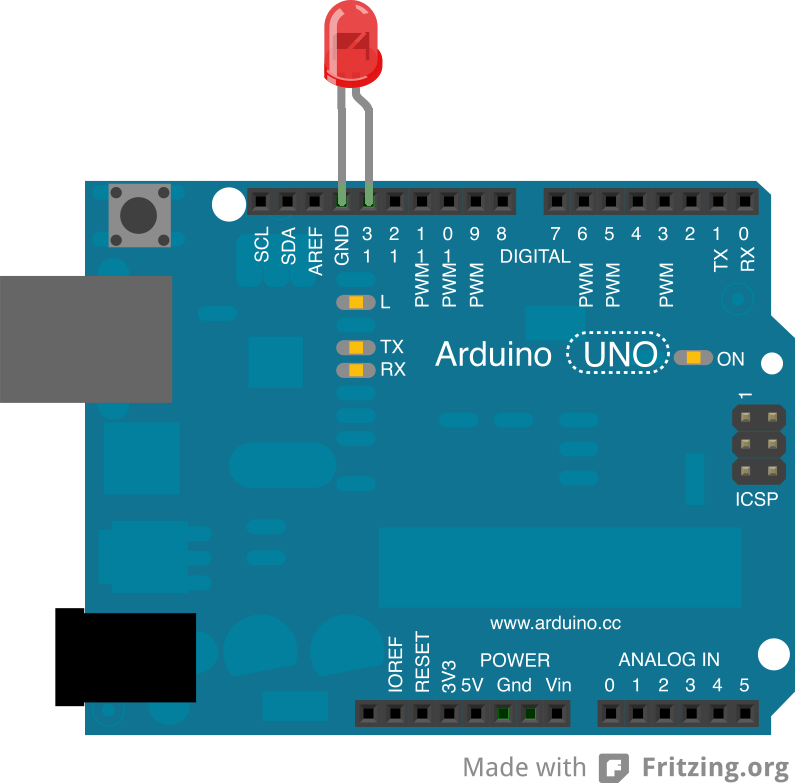
Upload skitch to arduino
void setup() {
 Serial.begin(9600);

 // initialize the digital pin as an output.
 // Pin 13 has an LED connected on most Arduino boards:
 pinMode(13, OUTPUT);
}

void loop() {
  int incomingValue = 0;           // from nodeJS

  if ( Serial.available() > 0 ) {  // check the incoming value
    incomingValue = Serial.read();
  }

  if ( incomingValue == 49 ) {     // if the value is '1'
    digitalWrite(13, HIGH);        // turn on the light
  }

  if ( incomingValue == 48 ) {     // if the value is '0'
    digitalWrite(13, LOW);         // turn off the light
  }
}↓

Use the modules!
Dude, it's the 21 century.
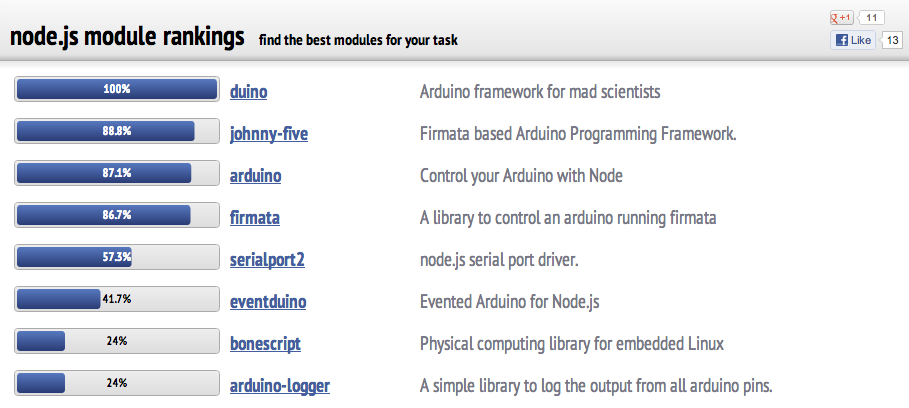
↓
npm install duino
#include <Servo.h>

bool debug = false;

int index = 0;

char messageBuffer[12];
char cmd[3];
char pin[3];
char val[4];
char aux[4];

Servo servo;

void setup() {
  Serial.begin(115200);
}

void loop() {
  while(Serial.available() > 0) {
    char x = Serial.read();
    if (x == '!') index = 0;      // start
    else if (x == '.') process(); // end
    else messageBuffer[index++] = x;
  }
}

/*
 * Deal with a full message and determine function to call
 */
void process() {
  index = 0;

  strncpy(cmd, messageBuffer, 2);
  cmd[2] = '\0';
  strncpy(pin, messageBuffer + 2, 2);
  pin[2] = '\0';

  if (atoi(cmd) > 90) {
    strncpy(val, messageBuffer + 4, 2);
    val[2] = '\0';
    strncpy(aux, messageBuffer + 6, 3);
    aux[3] = '\0';
  } else {
    strncpy(val, messageBuffer + 4, 3);
    val[4] = '\0';
    strncpy(aux, messageBuffer + 7, 3);
    aux[4] = '\0';
  }

  if (debug) {
    Serial.println(messageBuffer);
  }
  int cmdid = atoi(cmd);

  // Serial.println(cmd);
  // Serial.println(pin);
  // Serial.println(val);
  // Serial.println(aux);

  switch(cmdid) {
    case 0:  sm(pin,val);              break;
    case 1:  dw(pin,val);              break;
    case 2:  dr(pin,val);              break;
    case 3:  aw(pin,val);              break;
    case 4:  ar(pin,val);              break;
    case 97: handlePing(pin,val,aux);  break;
    case 98: handleServo(pin,val,aux); break;
    case 99: toggleDebug(val);         break;
    default:                           break;
  }
}

/*
 * Toggle debug mode
 */
void toggleDebug(char *val) {
  if (atoi(val) == 0) {
    debug = false;
    Serial.println("goodbye");
  } else {
    debug = true;
    Serial.println("hello");
  }
}

/*
 * Set pin mode
 */
void sm(char *pin, char *val) {
  if (debug) Serial.println("sm");
  int p = getPin(pin);
  if(p == -1) { if(debug) Serial.println("badpin"); return; }
  if (atoi(val) == 0) {
    pinMode(p, OUTPUT);
  } else {
    pinMode(p, INPUT);
  }
}

/*
 * Digital write
 */
void dw(char *pin, char *val) {
  if (debug) Serial.println("dw");
  int p = getPin(pin);
  if(p == -1) { if(debug) Serial.println("badpin"); return; }
  pinMode(p, OUTPUT);
  if (atoi(val) == 0) {
    digitalWrite(p, LOW);
  } else {
    digitalWrite(p, HIGH);
  }
}

/*
 * Digital read
 */
void dr(char *pin, char *val) {
  if (debug) Serial.println("dr");
  int p = getPin(pin);
  if(p == -1) { if(debug) Serial.println("badpin"); return; }
  pinMode(p, INPUT);
  int oraw = digitalRead(p);
  char m[7];
  sprintf(m, "%02d::%02d", p,oraw);
  Serial.println(m);
}

/*
 * Analog read
 */
void ar(char *pin, char *val) {
  if(debug) Serial.println("ar");
  int p = getPin(pin);
  if(p == -1) { if(debug) Serial.println("badpin"); return; }
  pinMode(p, INPUT); // don't want to sw
  int rval = analogRead(p);
  char m[8];
  sprintf(m, "%s::%03d", pin, rval);
  Serial.println(m);
}

void aw(char *pin, char *val) {
  if(debug) Serial.println("aw");
  int p = getPin(pin);
  pinMode(p, OUTPUT);
  if(p == -1) { if(debug) Serial.println("badpin"); return; }
  analogWrite(p,atoi(val));
}

int getPin(char *pin) { //Converts to A0-A5, and returns -1 on error
  int ret = -1;
  if(pin[0] == 'A' || pin[0] == 'a') {
    switch(pin[1]) {
      case '0':  ret = A0; break;
      case '1':  ret = A1; break;
      case '2':  ret = A2; break;
      case '3':  ret = A3; break;
      case '4':  ret = A4; break;
      case '5':  ret = A5; break;
      default:             break;
    }
  } else {
    ret = atoi(pin);
    if(ret == 0 && (pin[0] != '0' || pin[1] != '0')) {
      ret = -1;
    }
  }
  return ret;
}

/*
 * Handle Ping commands
 * fire, read
 */
void handlePing(char *pin, char *val, char *aux) {
  if (debug) Serial.println("ss");
  int p = getPin(pin);

  if(p == -1) { if(debug) Serial.println("badpin"); return; }
  Serial.println("got signal");

  // 01(1) Fire and Read
  if (atoi(val) == 1) {
    char m[16];

    pinMode(p, OUTPUT);
    digitalWrite(p, LOW);
    delayMicroseconds(2);
    digitalWrite(p, HIGH);
    delayMicroseconds(5);
    digitalWrite(p, LOW);

    Serial.println("ping fired");

    pinMode(p, INPUT);
    sprintf(m, "%s::read::%08d", pin, pulseIn(p, HIGH));
    Serial.println(m);

    delay(50);
  }
}

/*
 * Handle Servo commands
 * attach, detach, write, read, writeMicroseconds, attached
 */
void handleServo(char *pin, char *val, char *aux) {
  if (debug) Serial.println("ss");
  int p = getPin(pin);
  if(p == -1) { if(debug) Serial.println("badpin"); return; }
  Serial.println("signal: servo");

  // 00(0) Detach
  if (atoi(val) == 0) {
    servo.detach();
    char m[12];
    sprintf(m, "%s::detached", pin);
    Serial.println(m);

  // 01(1) Attach
  } else if (atoi(val) == 1) {
    // servo.attach(p, 750, 2250);
    servo.attach(p);
    char m[12];
    sprintf(m, "%s::attached", pin);
    Serial.println(m);

  // 02(2) Write
  } else if (atoi(val) == 2) {
    Serial.println("writing to servo");
    Serial.println(atoi(aux));
    // Write to servo
    servo.write(atoi(aux));
    delay(15);

    // TODO: Experiment with microsecond pulses
    // digitalWrite(pin, HIGH);   // start the pulse
    // delayMicroseconds(pulseWidth);  // pulse width
    // digitalWrite(pin, LOW);    // stop the pulse

  // 03(3) Read
  } else if (atoi(val) == 3) {
    Serial.println("reading servo");
    int sval = servo.read();
    char m[13];
    sprintf(m, "%s::read::%03d", pin, sval);
    Serial.println(m);
  }
}
↓
quite simple and elegant way

easy, huh?
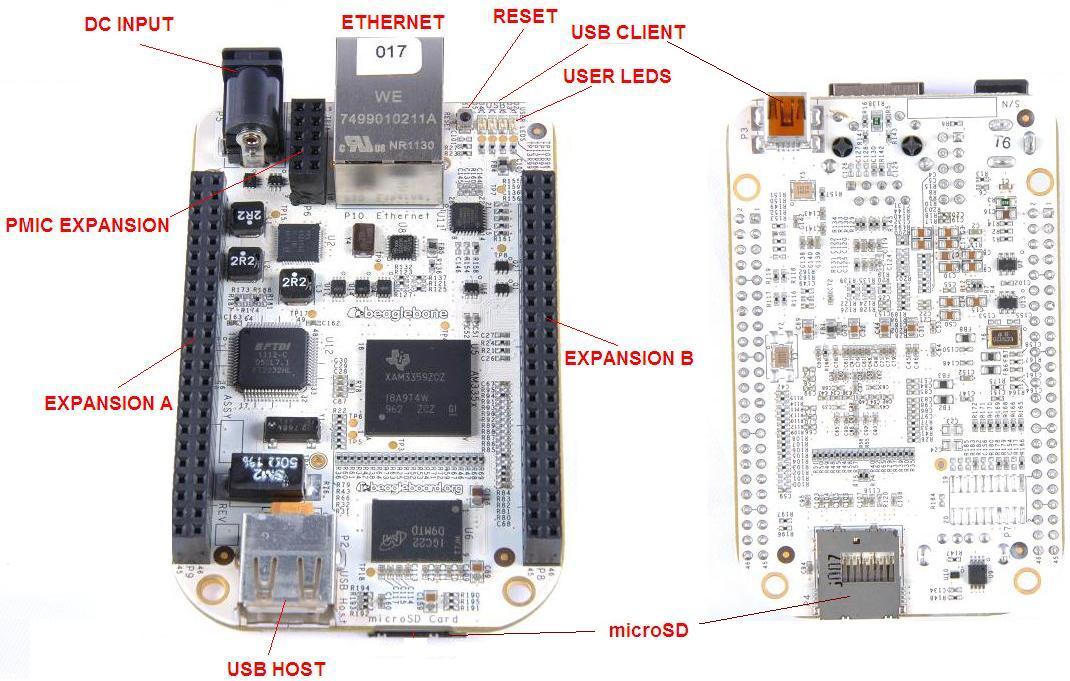
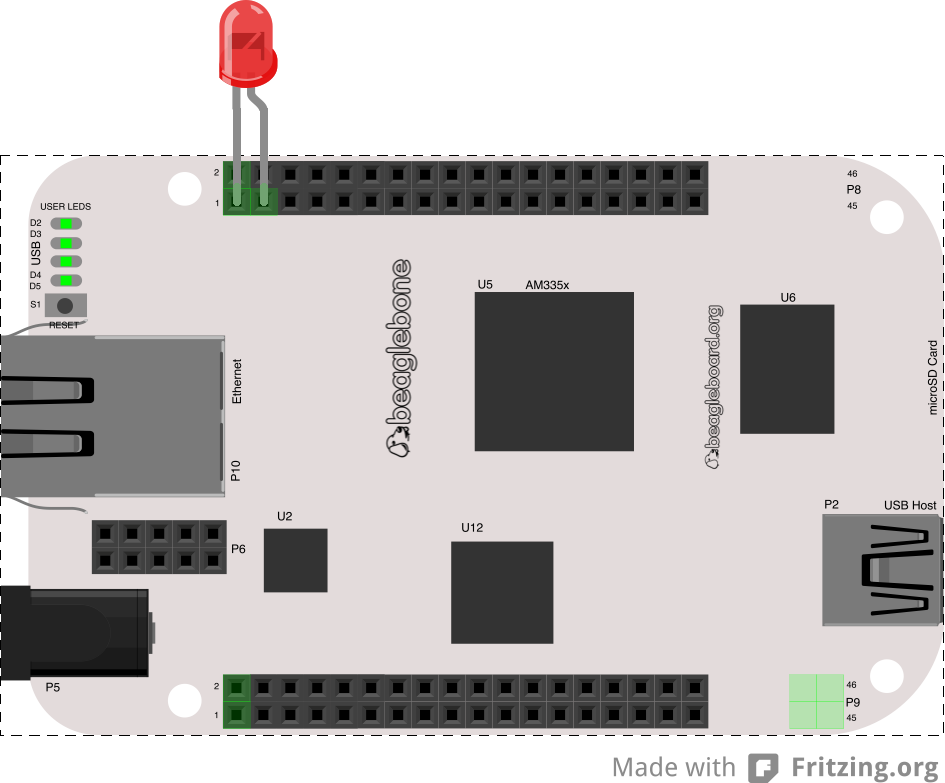
BeagleBone + NodeJS
↓
First Steps
- Buy SDCARD
- Copy Pre-installed image into SDCARD
- Power On
- Open Browser
PRE-INSTALLED nodeJS
AND Cloud9 IDE
it's running now!
↓
BoneScript
easy, huh?
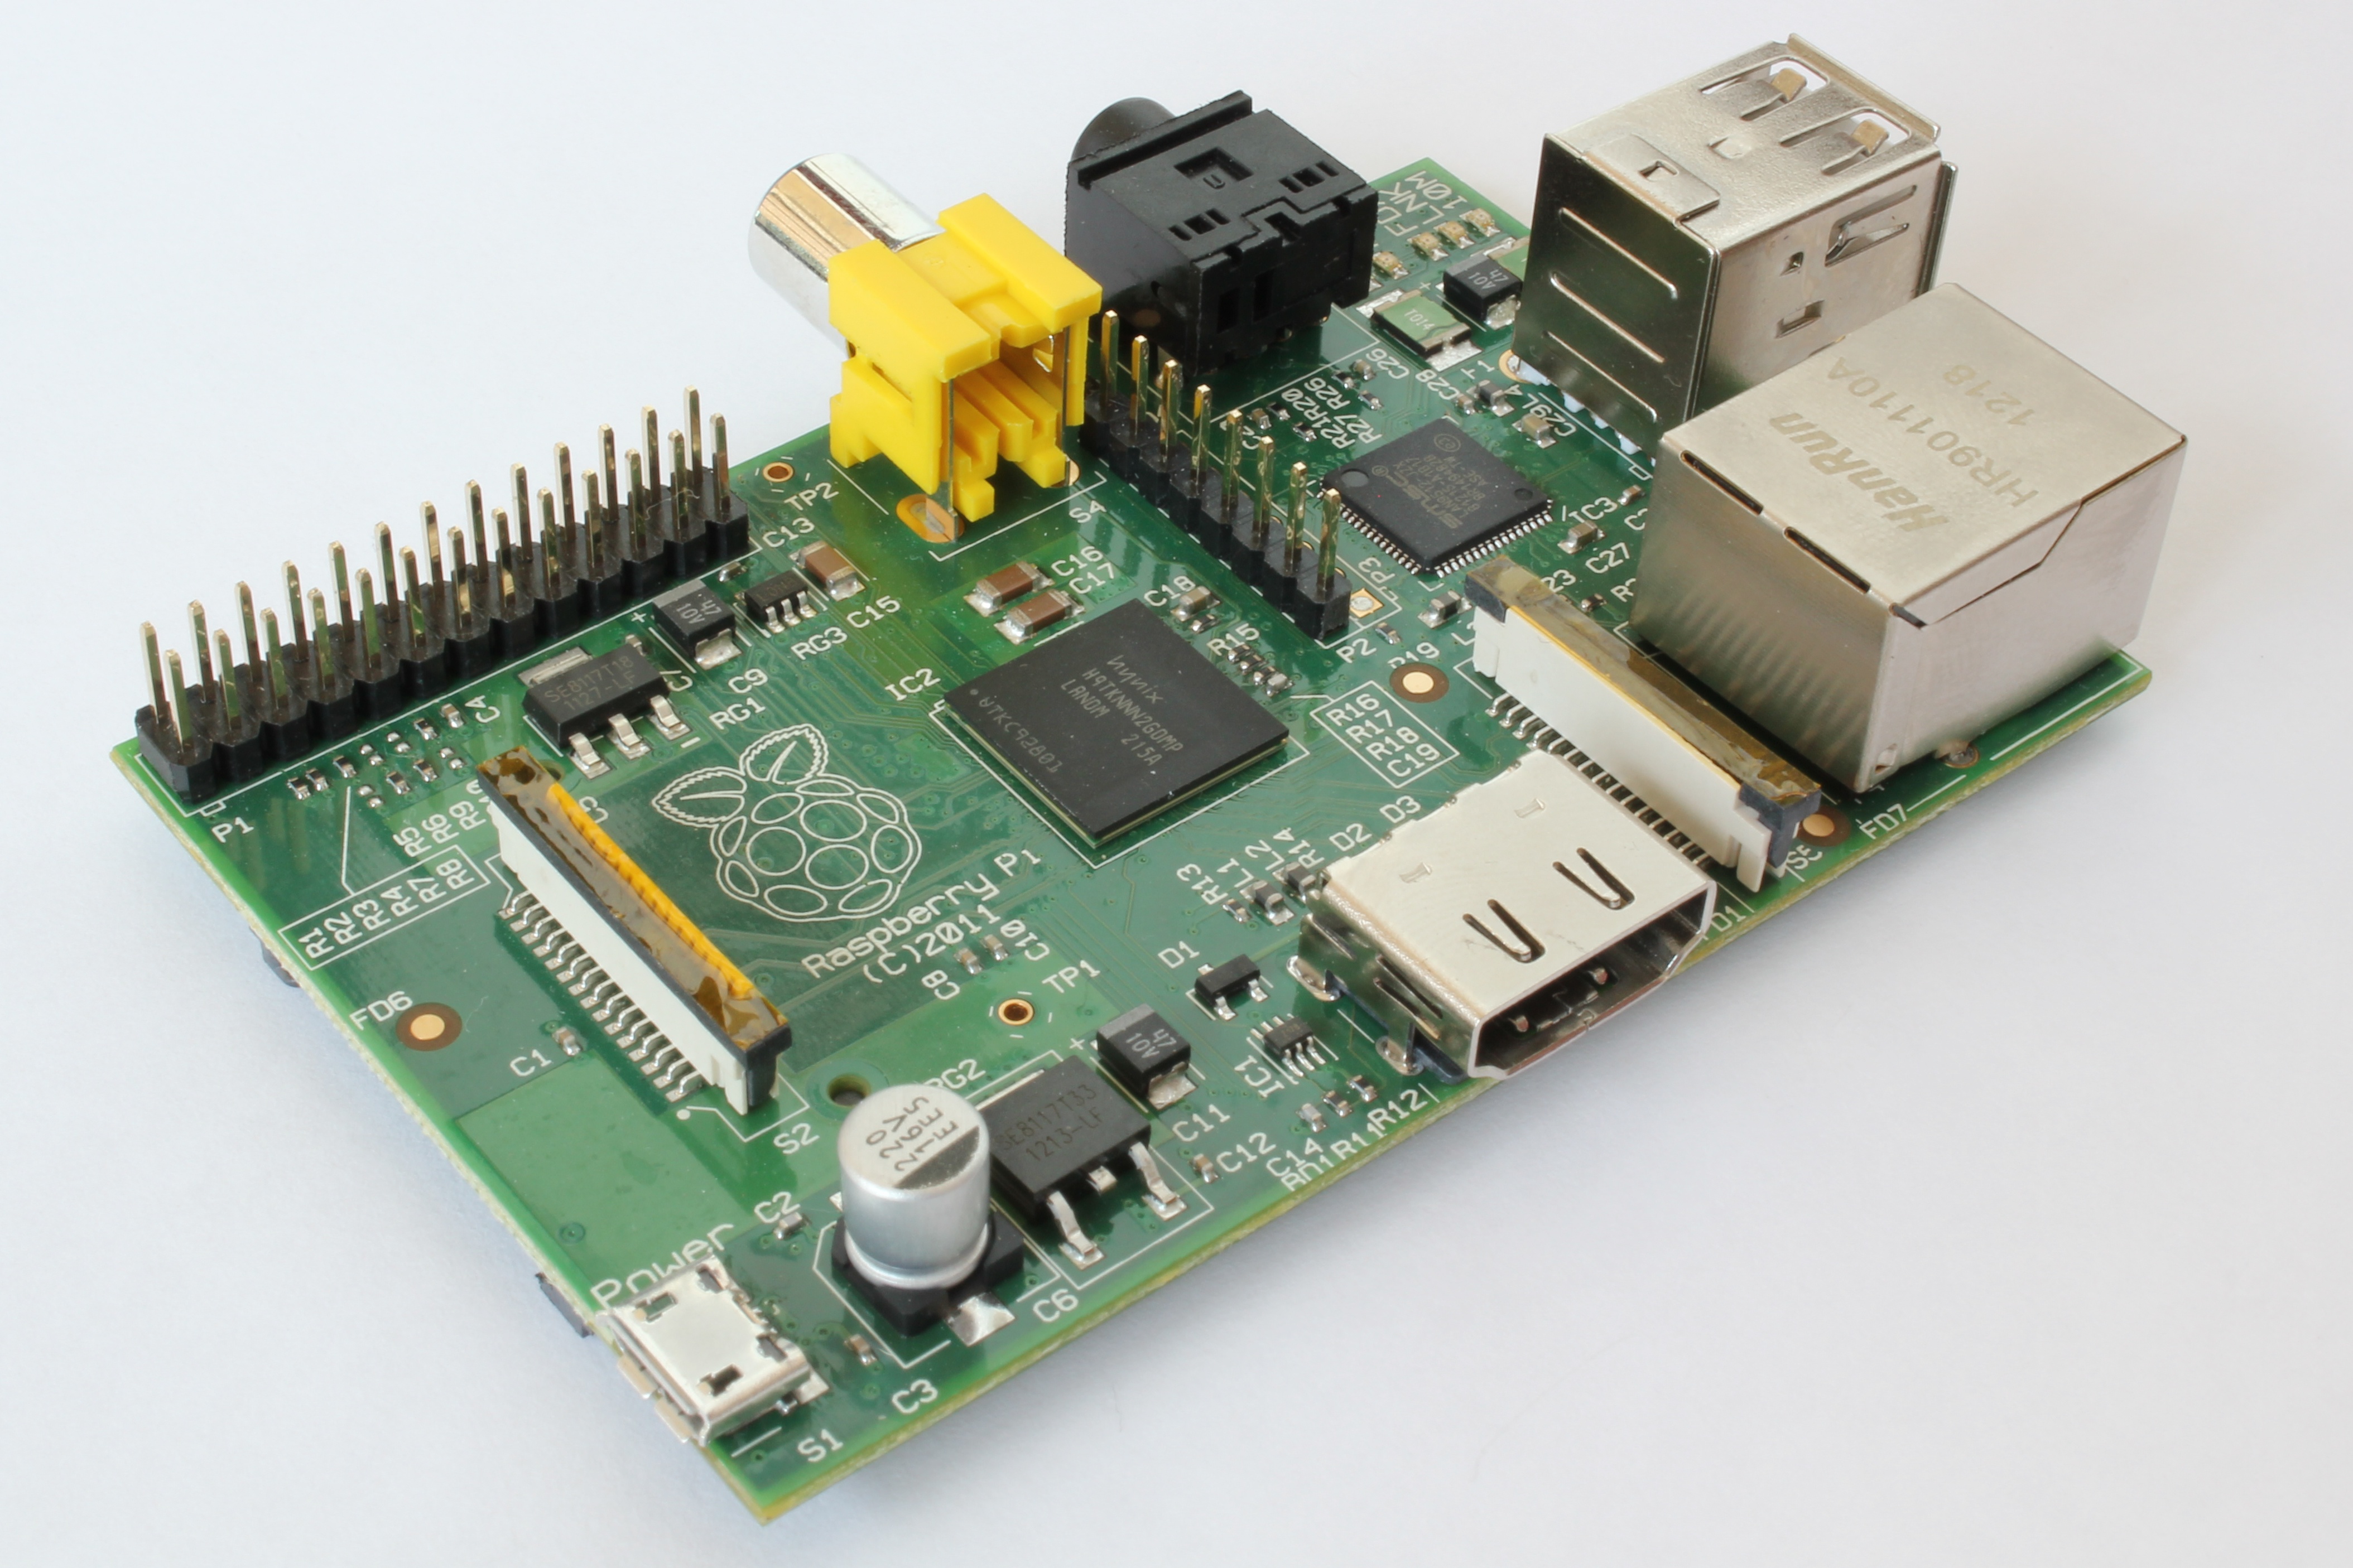
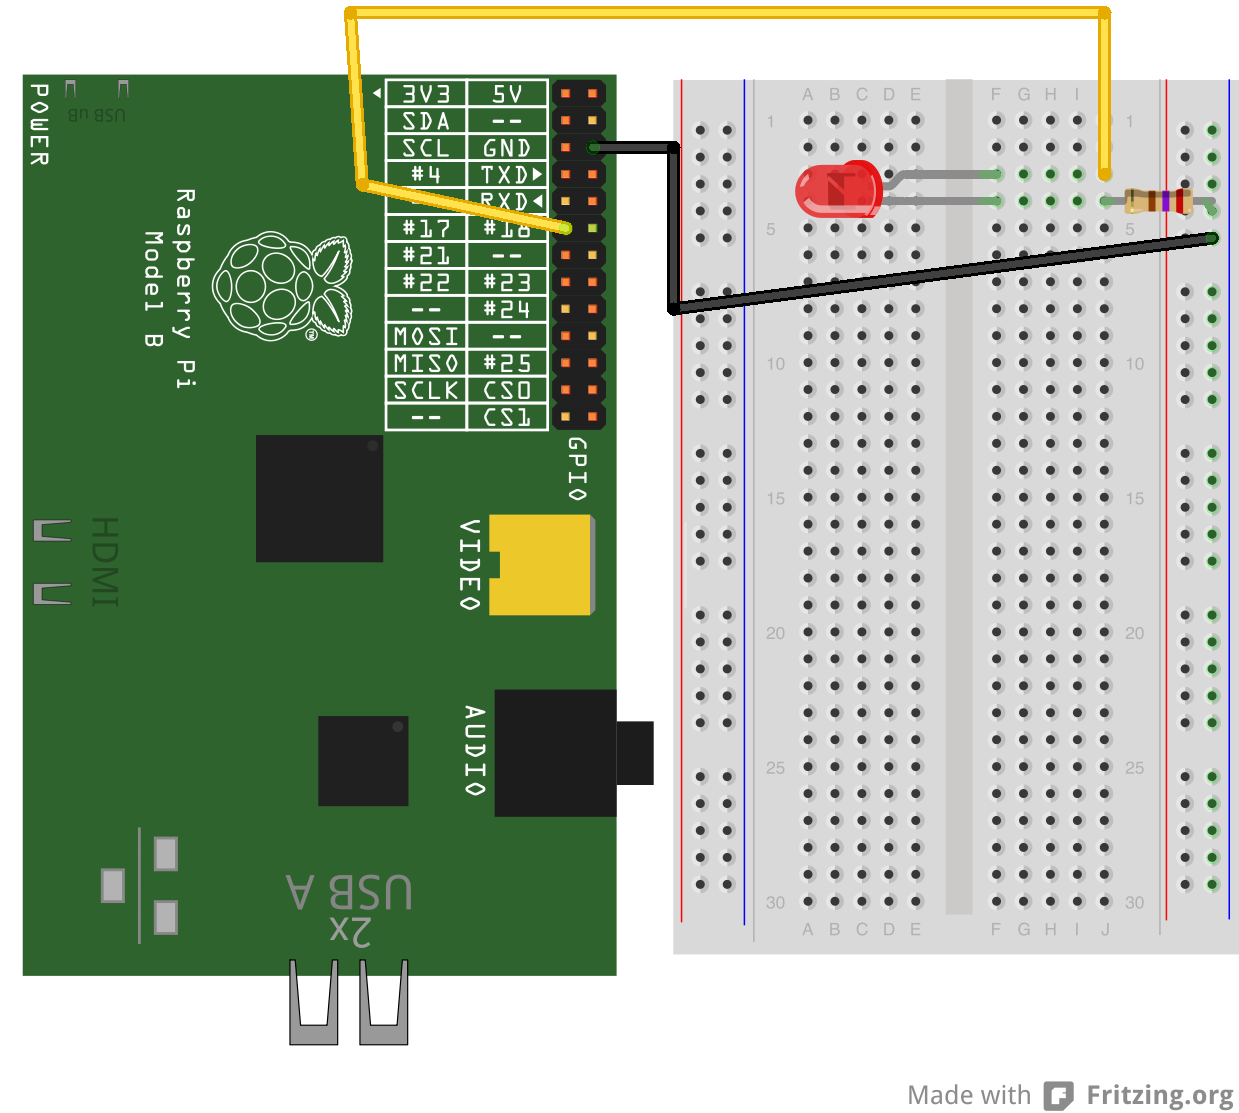
Raspberry Pi + NodeJS
↓
First Steps
- Buy SDCARD
- Copy Pre-installed image into SDCARD
- Power On
- Install NodeJS
- (And something more)
 [https://github.com/JamesBarwell/rpi-gpio.js](https://github.com/JamesBarwell/rpi-gpio.js)
↓
easy, huh?
These hardware make you prototyping easily!
so...
DON'T BE AFRAID
TO BUY ONE


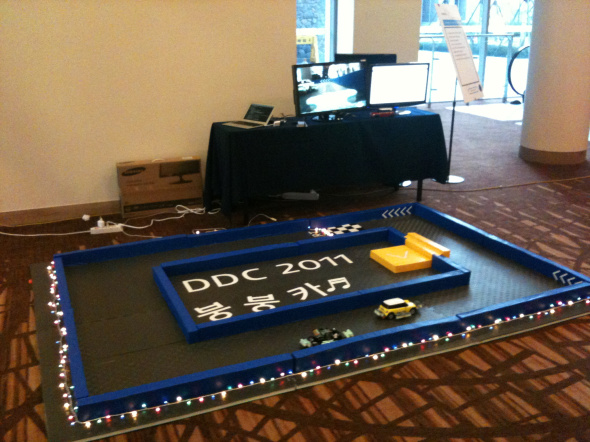
My Arduino RC Project!
BUY A CAR FIRST

RE-ASSEMBLE IT
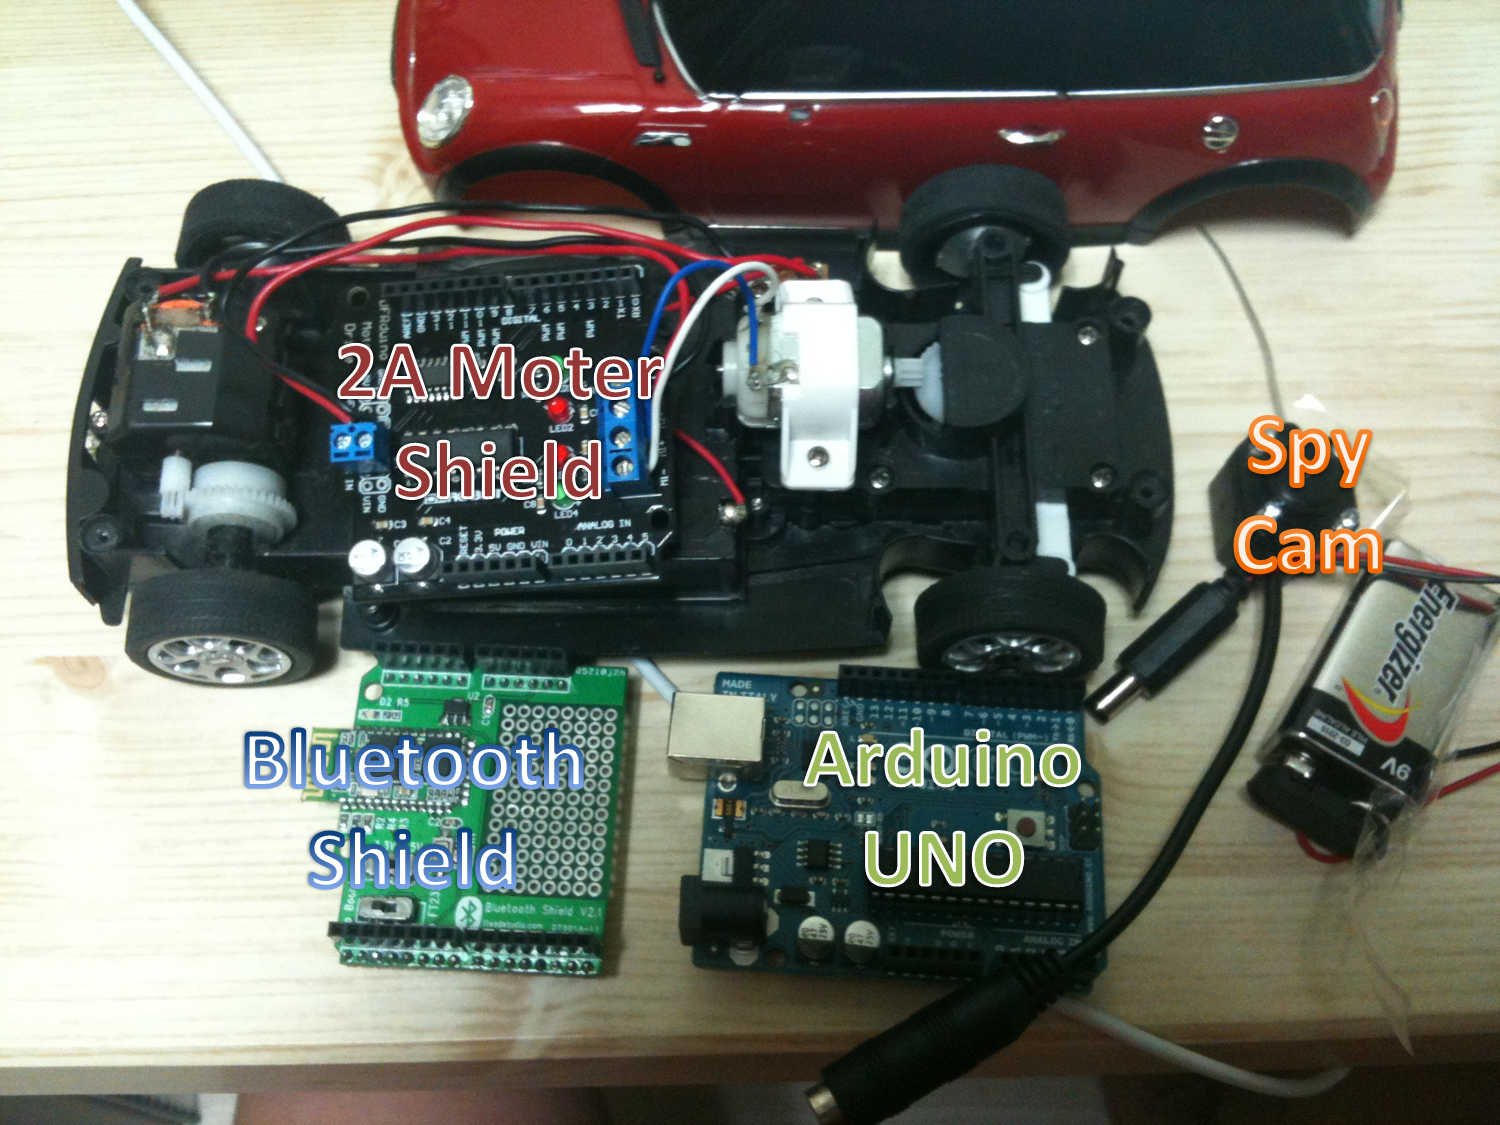
Ooops..
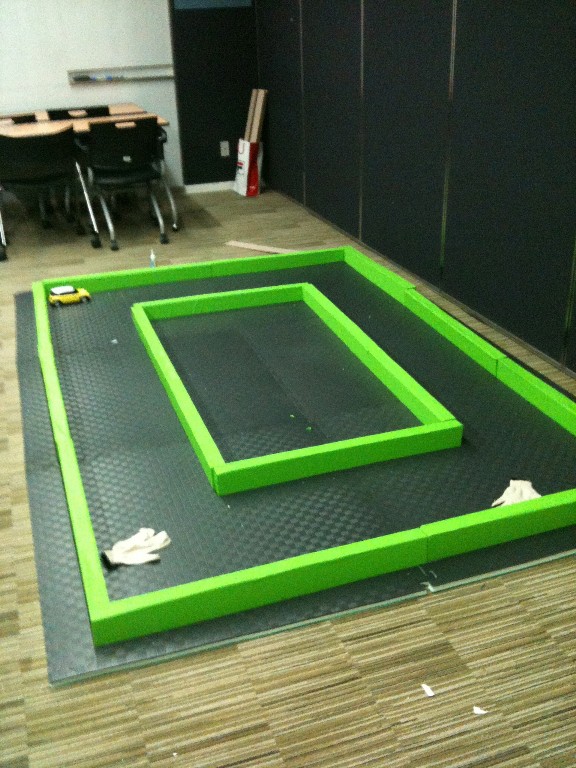
TA;DA
Model B now ships with 512MB of RAM!
It's up to you